Agents2007 Help Contents
- Introduction
- Application window
- Simulation window
- Settings
- Object palette
- Scripting - changing agents behavior
- XML files and configuration
- Examples
- About authors
Introduction
Agents2007 is a simple agents simulation system that allows users to create simulation scene, put agents and other objects on it and define their behavior to achieve variability in actions these objects perform. Actions, like picking up objects from the ground and transfering them to another place, can be done by defining different behavior scripts.
Application modes
There are two application modes:
- Editation mode - in this mode you can create your own scene, put objects on it (this is done by using object palette), move them and change their properties. You can also change simulation settings, save it or load another one. More info about editation can be found here.
- Simulation mode - whenever you press a play button, the simulation will start running, so you can observe agents behavior but you cannot edit the simulation scene. You can change simulation speed via speed slider and stop it via stop button. More info about simulation control can be found here.
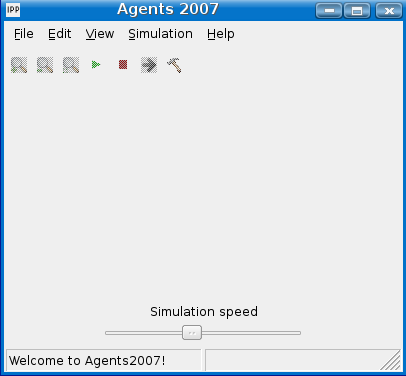
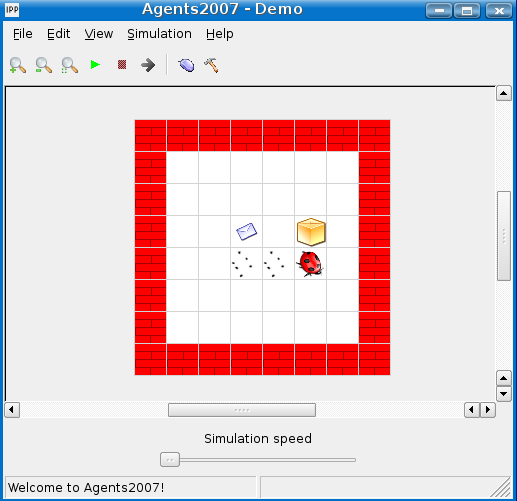
Application window
Getting started
When you launch Agents2007, application window will show up. Unfortunately, there is no simulation until you create or load one. When there is no simulation, simulation buttons are hidden and you cannot use them. Next sections will try to clarify all controls needed to successfully manage the simulation.
| Item | Description |
|---|---|
| File | Allows to work with the simulation |
| Edit | Allows to change application settings |
| View | Allows to change view of the simulation |
| Simulation | Allows to change simulation mode |
| Help | Provides additional information |
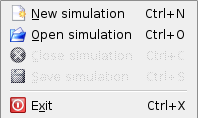
File menu
| Item | Description |
|---|---|
| New simulation | Creates new simulation with specified simulation name and scene size |
| Open simulation | Opens simulation form a file |
| Close simulation | Closes simulation (available only when a simulation is opened) |
| Save simulation | Saves simulation into a file (available only when a simulation is opened) |
| Exit | Exits application |
When the simulation is present or modified, after clicking on the close and exit item you will be asked whether to save current simulation or not.
Edit menu

| Item | Description |
|---|---|
| Application settings | Allows you to change directory from where palette configs are loaded and help file path |
The palette is described more precisely here.
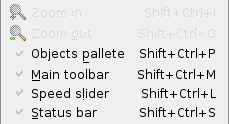
View menu
| Item | Description |
|---|---|
| Zoom in | Allows you to zoom in the simulation scene. Maximum zoom is 128 pixels. |
| Zoom out | Allows user to zoom out the simulation scene. Minimum zoom is 4 pixels. |
| Objects palette | Show/hide the object palette |
| Main toolbar | Show/hide the toolbar |
| Speed slider | Show/hide the speed slider |
| Status bar | Show/hide the status bar |
When simulation is not present, buttons to zoom in/out the simulation scene are disabled. The object palette is in a separate window, which can be hidden when it is not needed. The palette is discussed here. Main toolbar contains all frequently used buttons to control the simulation. Speed slider determines the speed of the simulation and finally status bar shows all necessary information about the simulation scene and status of the simulation.
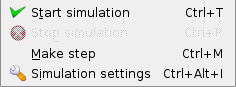
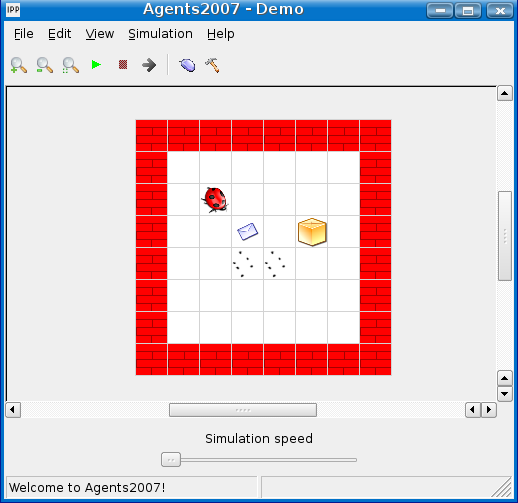
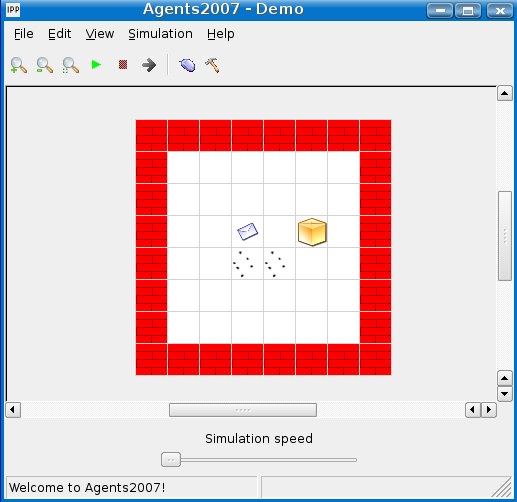
Simulation menu
| Item | Description |
|---|---|
| Start simulation | Allows you to start simulation |
| Stop simulation | Allows you to stop simulation |
| Make step | Allows you to make exactly one step of the simulation |
| Simulation settings | Allows you to change name of the simulation |
When simulation is not running, application is in editation mode. In this mode, you can modify the simulation using palette, destroyer etc. When the simulation is started the application is switched into simulation mode. In the simulation mode, all objects are performing actions. They behave according to their behavior way and interact each other. To return into editation mode you have to stop the simulation. Sometimes you need just one step to be performed. In this case use make step function. Because all these functions are often used they appear in the main toolbar too. If there is no simulation all functions are disabled.
Help menu
| Item | Description |
|---|---|
| Help contents | Shows this Agents2007 help contents |
| About | Shows basic information about authors and version of the appliaction |
Toolbar
For more comfortable usage a toolbar si present. It contains all frequently used functions to control the simulation and the scene.

| Item | Description |
|---|---|
| Zoom in | Allows zoom in the simulation |
| Zoom out | Allows zoom out the simulation |
| Recenter | Finds and shows the center of the simulation |
| Play | Starts the simulation |
| Stop | Stops the simulation |
| Step | Makes exactly one step |
| Mover | Moves object in the scene by clicking on that object and then clicking on another place |
| Destroyer | Removes object from the scene by clicking on that object |
Speed slider
Use speed slider to determine the speed of your simulation. Higher values means faster simulation.

Simulation window
When you want to start a new simulation you have to create new simulation scene which the simulation will be performed in. To do that use file menu and press new simulation item. Simulation settings will pop up.
Creating new simulation
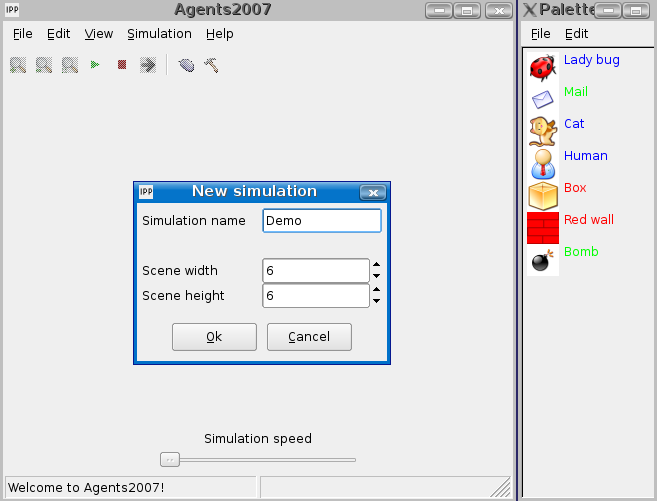
| Item | Description |
|---|---|
| Simulation name | Name of the simulation |
| Scene width | Desired width of the simulation |
| Scene height | Desired height of the simulation |
As soon as you confirm input settings with Ok, new simulation will be created.
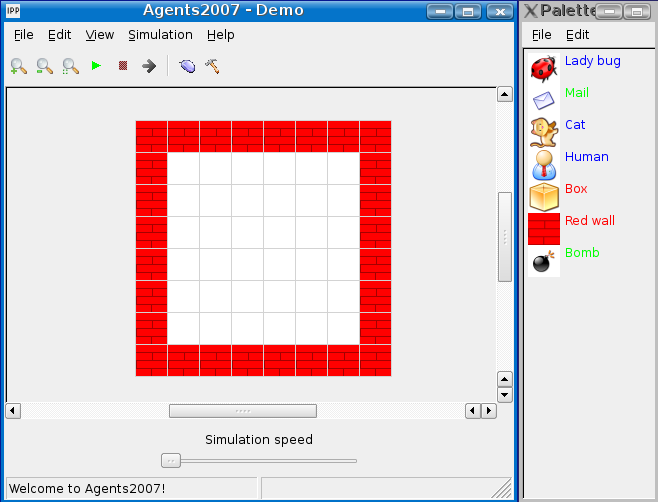
Manipulating with objects
You can do a lot of operations with objects in the simulation window. You can drop them from the palette, move them, erase them or edit them. When the simulation is created, it is empty. So first action is filling in the simulation with objects from the palette. You can do that this way. Just select required object in palette (it will be highlighted) and then put it on the simulation.
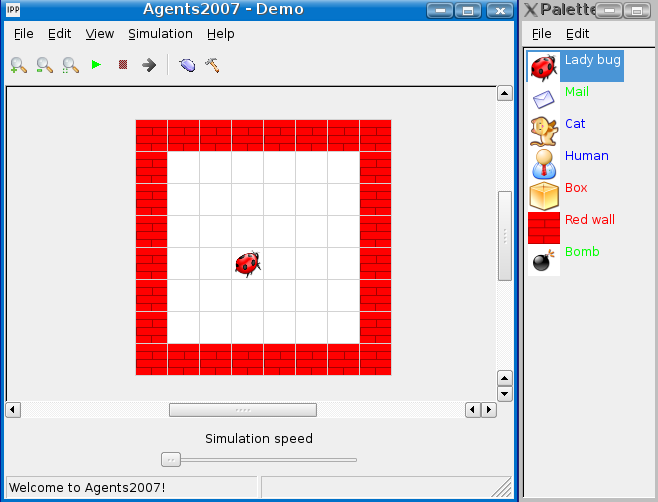
Then, you can add more objects and start/stop the simulation.
Sometimes, you need to move an object from one position to another. Then, use mover. Select your object and then put it on the right place. The object will be moved.

Another very important function is destroyer. It helps you to remove unneeded objects from the simulation.

Settings
There are two ways how you can edit all settings. You can configure everything in the GUI or you can edit XML files. First way is consulted here. Editation of XML files is not recommended, however, you can have a look in the XML files and configuration section and learn more about this topic.
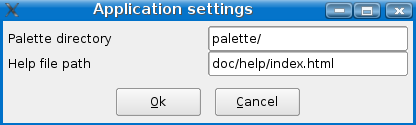
Application settings
In this window you can edit settings for whole application. These settings are stored in the active directory from where the application is running. So you can have more than one settings for the application and you can select from them just by changing the active directory.
| Item | Description |
|---|---|
| Palette directory | Path to the directory from where objects to the palette are loaded. Path can be either relative to the application directory or absolute |
| Help file path | Path to the help file. Path can be either relative to the application directory or absolute |
| OK | Push this button to apply changes and close window |
| Cancel | Push this button to close the window without applying changes |
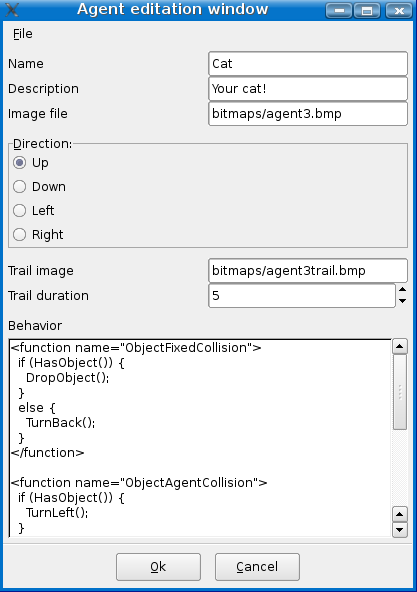
Object editation window
Agents, fixed and transferable objects can be edited in window similar to the one below. But not every type of object has all settings show there.
| Item | Description | Objects with the item |
|---|---|---|
| Name | Name of the object | All |
| Description | Short description of the object | All |
| Image file | Path to the file containing image of the object. Path can be either relative to the application directory or absolute | All |
| Direction | Direction of the object | All |
| Trail image | Image of the trail, the agent leaves behind. Path can be either relative to the application directory or absolute | Agent |
| Trail duration | Number of steps when the trail will be visible | Agent |
| Behavior | Agent's behavior is set here. See Scripting - changing agents behavior for more details. | Agent |
| OK | Push this button to apply changes and close window | All |
| Cancel | Push this button to close the window without applying changes | All |
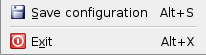
From the File menu in this window you can save the configuration of the object to a XML file. You can use this file in the palette or even on another computer. You can also close the window without applying settings from the menu (same as clicking on the cancel button).
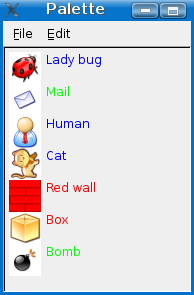
Object palette
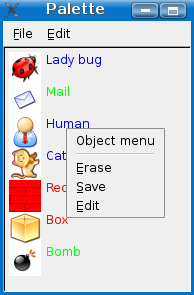
Palette
The purpose of this window is to collect objects that can be used in your simulations. You can easily add them to the scene from this place. Because the palette is simulation independent you can use similar or even same objects in many simulations.
When the application is started, palette window is filled with objects from default directory. You can change default directory in the edit menu. Do not forget that this setting depends on the directory from where you run the application.
The color of object name has following meaning:
| Color | Type |
|---|---|
| Blue | Agent |
| Green | Transferable object |
| Red | Fixed object |
Palette file menu

| Item | Description |
|---|---|
| Open single object file | Allows you to add one more object into the palette |
| Open all files from directory | Allows you to add all objects from selected directory into the palette |
| Save all objects into directory | Allows you to save all objects from the palette into the selected directory |
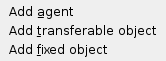
Palette edit menu
| Item | Description |
|---|---|
| Add agent | Adds empty agent into the palette |
| Add transferable object | Adds empty transferable object into the palette |
| Add fixed object | Adds empty fixed object into the palette |
When an empty object is added into palette it has default values. It is expected that the user will modify it to create desired behavior and appearance.
Palette pop-up menu
You can of course edit objects in the palette. Just move mouse pointer above chosen object and press right button - pop up menu will appear.
| Item | Description |
|---|---|
| Erase | Removes selected object |
| Save | Saves selected object into file |
| Edit | Edits selected object |
Scripting - changing agents behavior
If you want just to know how to (re)define behavior of agents, go here.
Language basics
Behavior of each agent can be extended or changed via so-called simkin scripts. Simkin is a XML scripting language developed by Simon Whiteside. More background info can be found at www.simkin.co.uk. Simkin syntax is quite easy to learn.
Body of script is, in general, list of methods. Each method has its name,
parameters and consits of statements and/or comments.
Example of simple script body:
<function name = "AddTwoNumbers" params = "num1,num2">
// this is comment, it has no effect
// assignment statement, adding method parameters
sum = num1 + num2;
// return statement, returns following expresion from method
return sum;
</function>
Statements
Simkin supports several types of statements, which are probably known from other programming languages.
Compund statement:
is just sequence of statements enclosed in pair of braces: { }
Example:
{
statement1;
statement2;
statement3;
}
Assignment statement:
has following format: Lvalue = Rvalue. Lvalue is any object, which can
appear on the left side of assignment statement, typically it's variable.
Rvalue typically evaluatable expression (note: expressions will be described
later in this chapter).
Example:
variable = value;
If else statement:
is control-flow statement and can be used to implement conditionals in scripts. Typical usage of this
statements is to implement different script behavior depending on condition,
i.e. to define different agent behavior depending on whether it's carrying
object or not.
Example:
if (sum(a,b) > 10) {
a = a + 2;
}
else {
a = a + 1;
}
Switch statement:
is generalised if else statement. It is used as replacement of many if else
if else if else ... inline statements.
Example:
switch(sum(a,b)) {
// list of possible actions
case 5 {
// here sum(a,b) equals to 5
a = a - b;
}
case 6 {
// here sum(a,b) equals to 6
b = b - a;
}
// etc...
// default action
default {
// this is executed when no match in other "cases"
a = a + b;
}
}
For statement:
is control-flow statement and allows code to be executed iteratively. It
consits of two sections. Start value, end value and optionally step value are
defined in the first section. Second section is block of statements (compound
statement) to be executed in each iteration. At the end of each iteration,
control variable (i in examples) is increased by step or by one, if step is
not defined. Step can be also negative.
Example (without step):
// this for loop prints out this sequence: 1 2 3 4 5
// first section
for i = 1 to 5
// second section
{
// trace() is built-in method, which prints its argument to output
trace(i);
}
Example (with step):
// this for loop prints out this sequence: 1 3 5
for i = 1 to 5 step 2 {
trace(i);
}
Example (with negative step):
// this for loop prints out this sequence: 5 3 1
for i = 5 to 1 step -2 {
trace(i);
}
While statement:
is control-flow statement and allows code to be executed iteratively. Unlike
for loop it executes block of statements while condition is true. It does
not have control variable as for loop (note: every for loop can be easily
rewriten as while loop, though).
Example:
while (sum(a,b) <= 20) {
a = a + 1;
b = b - 1;
}
Break statement:
is control-flow statement and allows to break out of a loop.
Example (for):
for i = 1 to 5 {
if (i = 2) {
break;
}
}
Example (while):
while (sum(a,b) <= 20) {
a = a + 1;
b = b - 1;
if (sum(a,b) = 10) {
break;
}
}
Return statement:
is optional statement, which can be used to return value from methods. If
there's no return statement, "null" value is returned. Return with no expression has same
effect as if it was omitted. (note: literals and operators in expressions will be described later in this chapter).
Example:
<function name = "sum" params = "a,b">
// returns sum of a and b
return a + b;
</function>
Call statement:
evaluates series of expressions and passes them as argument to a method.
Example (self method):
TakeObject();
Example (method in another object):
object.method(parameter);
Comments
Comments are generally used to make script more readable and more "obvious". There are two types of comments in simkin language:
- Line comments:
starts with "//" and ends with end of line
Example: // comment - Block comments:
starts with "/*" and ends with "*/"
Example: /* very long comment */
Data types
Simkin supports following data types:
| Type | Description | Example |
|---|---|---|
| self | a reference to the object owning the script | self.field="Hello"; |
| boolean | a truth value | true or false |
| integer | a signed number | 32 |
| float | a signed floating point number | 32.33 |
| character | a single character.Use "\" to quote characters | 'm', '\'' |
| string | an arbitrary length piece of text.You can embed any text except ". To use " put a backslash and then a quote \". | "He said \"Goodbye\" and left." |
| object | another Simkin object with methods and fields | MyObject |
Variables visibility
Variables defined within method, are visible only inside this method. Identifier begining with character "@" produce variable, which name is identifier's value.
Expressions, operators and literals
Simkin supports following expressions type:
| Type | Description | Example |
|---|---|---|
| literal | a literal value of one of the built-in data types | "Simon", 100 |
| self | a reference to the object owning the method | anotherObject.register(self) |
| null | an object meaning "nothing" | if (node=null) |
| identifier | this is the name of a variable or method, see below for scoping rules | MyVariable |
| indirection | you can prefix the identifier with @ to provide indirection | @MyVariable |
| attribute | this accesses an attribute in another object. | Account:Balance |
| field | this accesses a field or method in another object, or a sub-item within a field | Account.getPerson().Surname |
| self method call | calling a method on the current object and using the return value | sendMessage(message) |
| subexpression | for grouping expressions and enforcing precedence | (4+1)+5 |
| Logical Operators | ||
| not | negates an expression | not Overdrawn |
| and | logical and | Overdrawn and WithinRedZone |
| or | logical or | DepositAccount or CurrentAccount |
| Relational Operators | ||
| equality | equality test | Name="Simon" |
| inequality | inequality test | Name!="Simon" |
| less than | integer/float less than | a lt b or a < b |
| less than or equal to | integer/float less than or equal to | a le b or a <= b |
| greater than | integer/float greater than | a gt b or a > b |
| greater than or equal to | integer/float greater than or equal to | a ge b or a >= b |
| Arithmetic Operators |
||
|
Note: Arithmetic operations are performed using floating point numbers,
unless both values are integer. For example:
1 + 2 = 3
|
||
| subtract | integer/float subtract | 12 - 1 |
| add | integer/float addition | 12 + 1 |
| minus | integer/float inversion | - 1 |
| times | integer/float multiplication | 12 * 1 |
| divide | integer/float division | 12 / 1 |
| modulus | integer modulus | 12 % 1 |
| String Operators | ||
| concatenation | adding two strings together | "First Name " # " Surname" or "First Name " & " Surname" |
| Array Operators | ||
| array index | for accessing child objects (indices start from 0) | a = f[6] |
Simkin built-in methods
String handling
- length(stringValue)
returns length of its parameter - charAt(stringValue,position)
returns character at position position in string stringValue
Debugging
- trace(value)
outputs value to standard output
Standard conversions
- toInt(value)
returns value converted to integer number
Example:
a = "1.0";
trace(toInt(a)); // will output "1" - toFloat(value)
returns value converted to floating point number
Example:
a = "1";
trace(toFloat(a)); // will output "1.0000" - toString(value)
returns value converted to string
Example:
a = "1.0";
trace(toString(a)); // will output "1.0" - toChar(value)
returns value converted to single character
Example:
a = "1.0";
trace(toChar(a)); // will output "1" - toBool(value)
returns value converted to boolean
Example:
a = "1.0";
trace(toBool(a)); // will output "true" - isObject(value)
returns true if value is object
Example:
a = "1.0";
trace(isObject(a)); // will output "false"
Using simkin to (re)define behavior of agents
There are two types of the next action decision:
- No collision detected - agent can decide whether just go or to perform another action, like random action (movement). This way it is really easy to implement agent that moves randomly.
- After collision - when an agent impacts into another object it checks its behavior script to see what to do. Script entry point depends on which object agent hit. For each collision type there exists one entry point to the behavior script. Entry point described in previous text is just the method, which is called first. Following table shows naming conventions for each collision type.
| Collision with | Method called | Parameters |
|---|---|---|
| Agent | ObjectAgentCollision | none |
| Fixed object (i.e. wall) | ObjectFixedCollision | none |
| Transferable object | ObjectTransferableCollision | none |
| No collision | NotInCollision | none |
In each method, controling of agent is done via following built-in methods. Calling more than one of control methods listed below doesn't makes much sense, because each agent can make only one action at time (at one step). So calling sequence of these methods will force agent only to perform the last action, the rest will be "ignored".
| Built-in Method | Parameters | Return value type | Description |
|---|---|---|---|
| HasObject | none | bool | Returns true if the agent is carrying object |
| TakeObject | none | bool | Agent takes transferable object. Returns true if taking the object was successful (i.e. agent didn't carry object before) |
| DropObject | none | bool | Agent drops transferable object. Returns true if dropping the object was successful |
| TurnLeft | none | none/null | Agent turns left |
| TurnRight | none | none/null | Agent turns right |
| TurnBack | none | none/null | Agent turns around |
| Go | none | none/null | Agent goes straight forward. This is typically not desired, because agent entered into "collision state" most likely because it hit something in the front of it |
| RandomAction | none | none/null | Agent performs pseudo-random action (one of previous, but only movement action) |
Feel free to define as many other methods as needed and call them in
"collision handlers" listed above or in each other.
Note: Simkin also allows you to define another objects in the behavior
script, but in most cases, this is useless. Predefined methods, built-in
methods and several user-defined methods should be enough to describe
agents' behavior.
Script examples
<function name = "ObjectAgentCollision"> // method is called when agent hits another agent if (HasObject()) { DropObject(); } else { TurnRight(); } </function> <function name = "ObjectFixedCollision"> // method is called when agent hits fixed object (i.e. wall) TurnBack(); </function> <function name = "ObjectTranserableCollision"> // method is called when agent hits transferable object if(not HasObject()) { TakeObject; } else { TurnLeft(); } </function> <function name = "NotInCollision"> // method is called when the agent is deciding its new action // and when it is not in collision Go(); </function>XML files and configuration
The configuration is saved in several types of XML files. Manual editation of these files is an alternative
way of configuration. In some cases it can be more powerful than standard way. But be careful, you can
damage your data. Every configuration file has root element named agents2007.
Some elements have attributes of a specific type.
| Type | Allowed values | Description |
|---|---|---|
| Unsigned integer | 0, 1, 2, 3 ... | Natural numbers and in some occasion number 0 |
| Boolean | 0, 1 | 0 is representing false or off and per contra 1 stands for true or on |
| String | One character or more | Text |
| Path | String | Path to a directory or file. It can be either absolute or relative to the application path |
Main configuration file
Application settings are stored in special XML file. You can find it in a directory from where you run the application. Its name is .agents2007.xml. If you remove this file, new version will be created after the aplication is started and closed. But all configuration changes made previously will be lost. Note: There are special configuration file in every directory from where you run the application.
Root element has only one child element application with attributes shown below. Every
missing attribute will be replaced by the default value.
Object configuration files
Every object in the palette has its special XML file. But function of these files can be different, too. For example you can share objects with your friends etc. You can have these XML files anywhere in your filesystem but only objects in the palette directory are automatically loaded into the palette.
Root element has only one child element. It can be agent, transferable or
fixed with attributes shown below.
Simulation configuration files
After you save your simulation it is saved in a file of this format. You can save as many simulations as you want. You can share them with your friends or just leave them for later usage.
Root element has two child elements: matrix and canvas with attributes and/or
childs shown below.
XML Elements
Element application
| Attribute | Type | Description |
|---|---|---|
| palette_path | Path | Path, where the palette is stored |
| help_file_path | Path | Path, where the file with help is stored |
| window_height | Unsigned integer | Height of the main program window |
| window_width | Unsigned integer | Width of the main program window |
| show_toolbar | Boolean | Visibility of the toolbar in the main window |
| show_statusbar | Boolean | Visibility of the status bar in the main window |
| show_palette | Boolean | Visibility of the palette |
| show_speed_slider | Boolean | Visibility of the speed slider |
Object elements
| Attribute | Type | Description | Objects with the attribute |
|---|---|---|---|
| direction | Unsigned integer | Direction of the object, for representation of numbers look into source files | All |
| action | Unsigned integer | Action of the object, for representation of numbers look into source files | All |
| image | Path | Path to the image representing the object | All |
| name | String | Name of the object | All |
| description | String | Description of the object | All |
| trail_image | Path | Path to the image of agent's trail | Agent |
| trail_duration | Unsigned integer | Number of steps when the trail is visible | Agent |
| duration | Unsigned integer | Number of steps until the trail disappear | Trail |
agent has one child element named behavior containing agents behavior as CDATA.
Element matrix
| Attribute | Type | Description |
|---|---|---|
| height | Unsigned integer | Height of the main window |
| width | Unsigned integer | Width of the main window |
matrix has as many child cell elements as needed.
Element cell
| Attribute | Type | Description |
|---|---|---|
| x | Unsigned integer | Column of the cell in the matrix (scene) |
| y | Unsigned integer | Row of the cell in the matrix (scene) |
Every cell element has exactly one child. It can be agent, transferable,
fixed or trail element.
Examples
Here you can find some examples that you can use. Simulation files are stored here and object files here. For creating your own objects you can use some images stored in the bitmaps directory (application_directory/bitmaps), originaly stored here here.
Simulations
- Demo 1 - Simple simulation demo
- Demo 2 - Next simple simulation demo (larger scene)
- Random bugs - "Random moving agents" in action
- Maze - Agents trying to find a way out of the maze
Objects
- Lady bug - "random moving agent" (implementing "random" agent from the project assignment)
- Human - classic agent, can take objects
- Cat - cannot take objects
- Bomb - transferable object, agents can take it and move it
- Mail - another transferable object
- Red wall - classic wall, agents cannot go through it
- Box - heavy box, impassable too
About authors
| Libor Polčák | xpolca03@stud.fit.vutbr.cz |
| Boris Procházka | xproch63@stud.fit.vutbr.cz |
| Martin Rapavý | xrapav00@stud.fit.vutbr.cz |
| Petr Zemek | xzemek02@stud.fit.vutbr.cz |
We are students from the Faculty of Information Technology at Brno University of Technology in the Czech Republic and this is our project for Principles of programming languages and promotive C++ seminary. Feel free to send us an email whether you like this application or some ideas how to improve it. Bug reports are also welcomed.

